|
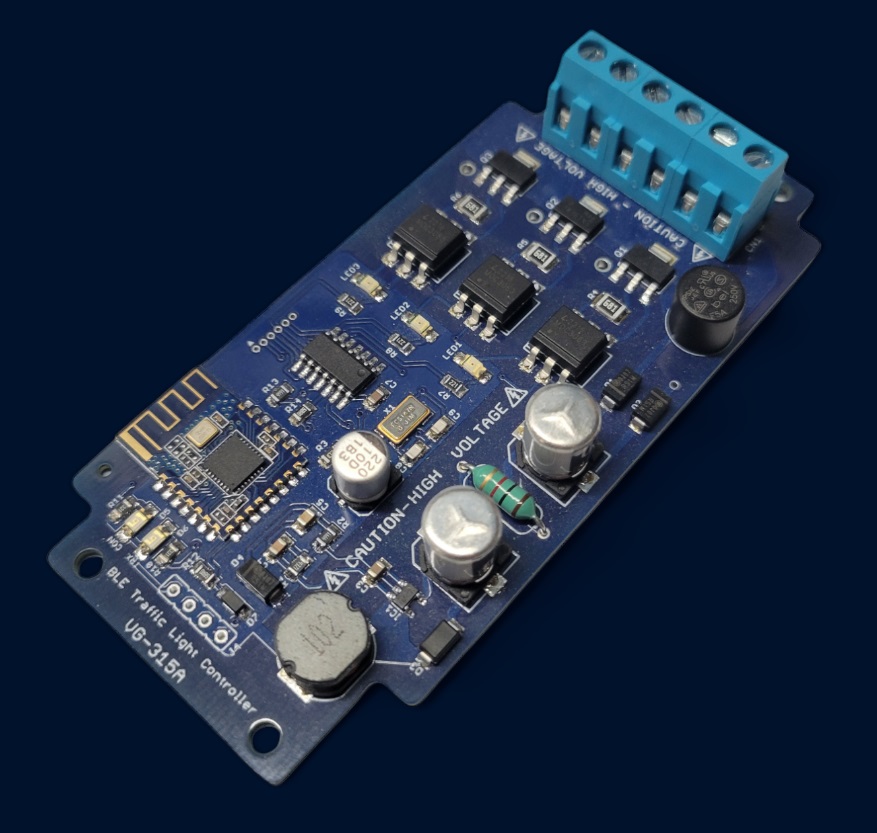
VG-315A Bluetooth® Traffic Light Controller
 |
|
Thank you for your interest in the Bluetooth® AC Traffic Light Controller. This unit is designed with ease and utility in mind. There are 39 unique
programs, including 19 realistic traffic light modes, that allow for a variety of sequencing possibilities. Each sequence is customize with multiple duration settings,
providing more precise control than any other controller on the market. The duration controls independently set each output with durations from 0.1 seconds to 6 minutes.
The Bluetooth® AC Traffic Light Controller accepts line voltages from 85VAC to 265VAC. On the output side, the noiseless solid-state switches can operate incandescent bulbs
up to 600 watts, but are sensitive enough for 1 watt LED bulbs. This makes it compatible with virtually any type of bulb. There are three colored LEDs that correspond
with each output, making setup and wiring a breeze.
If you have already purchased a VG-315A, make sure you have the controller and four (4) adhesive standoffs.
If any of the mentioned items are missing, please contact us by phone at (302) 832-1978 or send us an e-mail us at the address listed at the bottom of the page. We appreciate
your business, so feel free to provide us with any suggestions or comments you have regarding this or any other Galak Electronics product.
|
Quick Start Installation
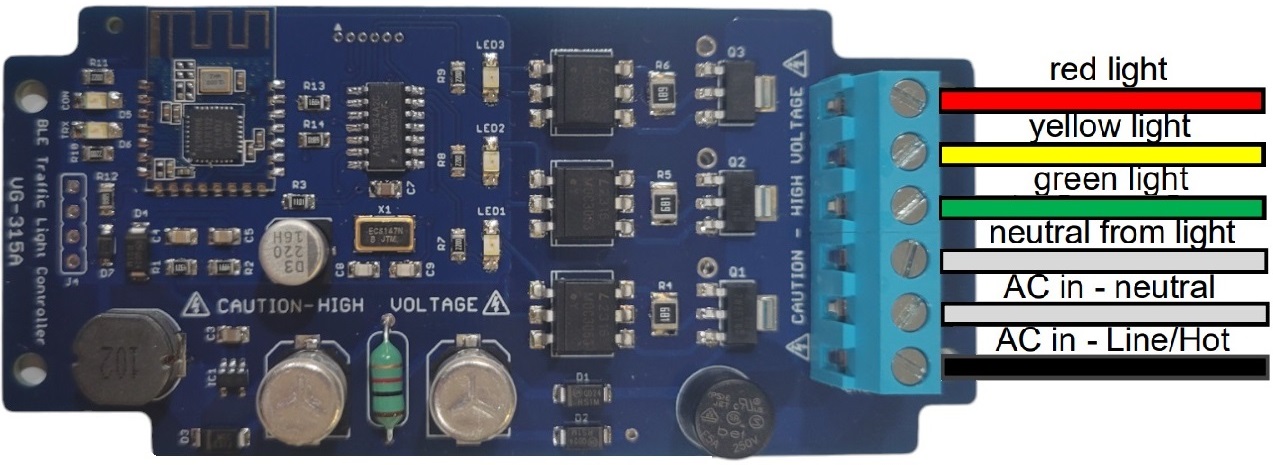
1. Connect the AC Line and Neutral power wires as shown below. Do not connect the outputs. Apply AC power and verify that the three LEDs labeled LED1-LED3
illuminate. Disconnect power (Please note: european power cords use blue for neutral and brown for line).
2. Connect the wires from your traffic light to the connectors as shown below. If your light has multiple neutrals, tie them together with a wire nut.
To change the program sequence, please refer to the section below titled Mode Selection. The durations can be individually adjusted through the App.
 |
|
IMPORTANT NOTICE: Please observe applicable electrical wiring codes when utilizing this product. This device is fused with a non-replaceable 5A 250VAC UL-approved fast-
acting fuse and will only blow under direct short circuit conditions. The user acknowledges that Galak Electronics is not liable for damages (including shock, fire,
property damage, or death) due to the improper use or installation of this product. Furthermore, this unit is not intended for outdoor use. For outdoor applications,
a UL approved waterproof enclosure is available. Please call us at (302) 832-1978 or e-mail us below if you have any concerns or questions about the safe and proper
installation of this product.
|
Powering up your Traffic Light Controller
After double-checking your wiring, attach your AC power leads to CN1. The white neutral wire connects to the terminal marked NEUT, and the black hot wire connects
to the terminal marked LINE. Ensure that both terminals are sufficiently tight to ensure the wires don't come loose. Do not connect the outputs or power the unit
on at this point. Make sure the unit is on a non-conductive surface or securely mounted. Apply AC power to the unit. The Red LED should illuminate immediately. After
about 2 seconds, the controller will start cycling through a normal 3-way traffic light pattern. The default durations for the Red and Green lights are 3 seconds while
the defaults durations for the Yellow light are set to 1 second. Refer to the Duration Setting section below for more information on how to set each duration.
If you get no response from the LEDs after applying power, disconnect your AC power source and check all your connections. If you still get no results or the fuse
has blown, please contact Galak Electronics. If the problem can't be resolved, we will be happy to repair your unit free of charge in most cases. You just pay the
shipping costs.
Connecting to the Outputs
Now that you have verified the unit is cycling properly, you can connect up your AC loads. First, make sure the AC power is disconnected before making any connections.
Insert the common neutral wire (white) from your signal into the upper NEUTRAL terminal of CN1 and insert the hot wire (red) from your RED light into the CN1 terminal
marked "RED". Next, insert the hot wire (typically brown or yellow) from your YELLOW light into the CN1 terminal of marked "YEL". Finally, insert the hot wire (usually
green) from your GREEN light into the CN1 terminal marked "GRN". Please note that if your traffic light has three separate neutral wires for each light, they
must be combined with a wire nut. If your traffic light has a terminal connector, you can combine the neutral connections on one side of the terminal and connect a
single wire for the neutral. |
|
 |
Application Download
Please note: We are still in the process of making our app available on Google Play. Click on the link below using your Android device. You may receive a
message or warning regarding the security of this software. Our site is SSL certified and your connection is encrypted, so rest assured you are safe to download
our software.

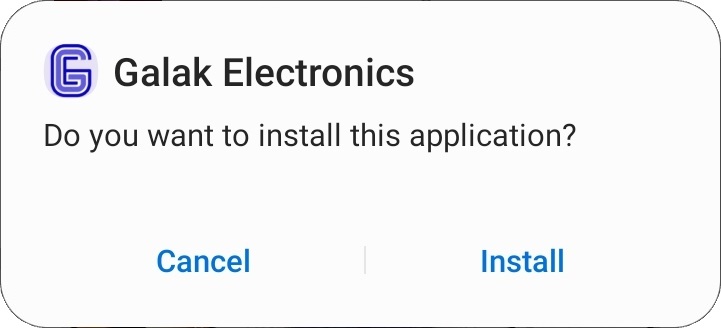
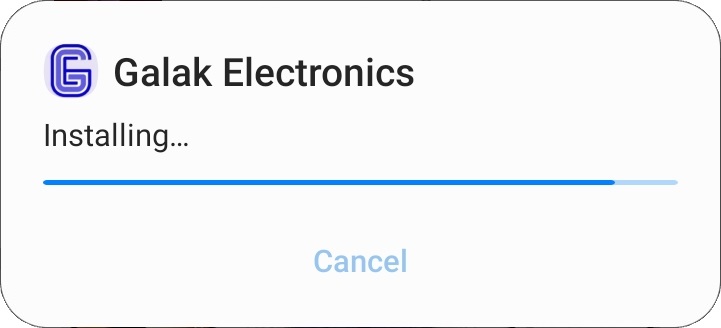
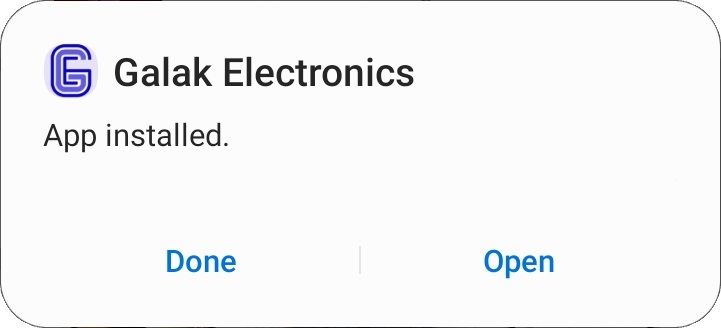
Once the app has been downloaded, you will be prompted to Open File. Click Open file to install the app. The following progression
of windows should appear if the app installs correctly.
 |
|
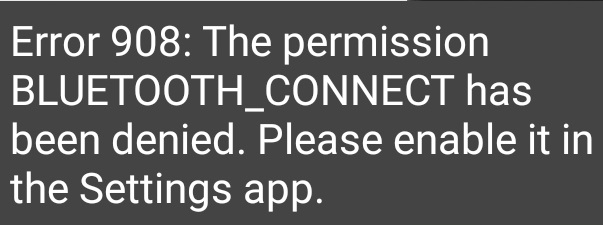
Click Open to launch the application. Ensure that your VG-315A Traffic Light Controller is powered. Besides the red, yellow, and green
LED lights cycling, the blue "TRX" LED should also be flasing. This indicates that the Bluetooth module is ready to connect. If you receive an error message as shown on
the left, close the app and open your settings to enable your device's Bluetooth. Relaunch the app. Next, you will receive a message prompting you to allow Galak Electronics to
"find, connect to, and determine the relative position of nearby devices." Select Allow to connect to your VG-315
Traffic Light Controller.
|
Connecting your Android Device
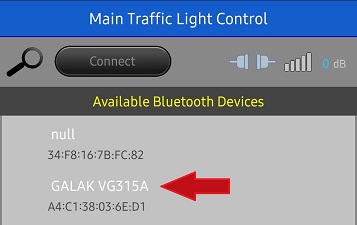
To connect your Android device to the VG-315A Traffic Light Controller, press the magnifying glass in the upper-left corner. A list of Available
Bluetooth Devices will appear. Locate the device named GALAK VG315A and click on it. The Connect button above the list will change from
gray to green. Press the Connect button to establish a connection between your Android device and the Controller. The images below
show the device list and the highlighted device as well as the message when the device is connected.
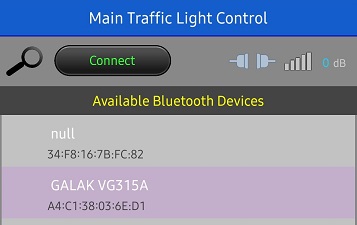
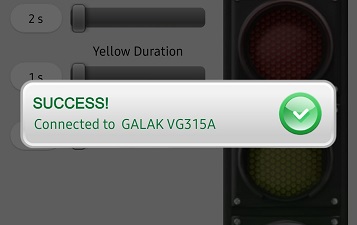
Once the device is successfully connected, the Connect button will change to Disconnect, the
connection icon in the upper-right will close, and the signal strength bars will register the signal strength. The traffic signal lights will now follow the
LED light sequence on the controller.
Manual Traffic Light Control
When connecting your Android device to the VG-315A Traffic Light Controller for the first time, the controller will be in default program mode 1. This is a standard
traffic light sequence. By toggling the Power switch you can turn the outputs to your traffic light on and off. When the switch is in the "OFF" position,
the VG-315A will continue to receive power and the two blue lights on the controller will stay illuminated. However, the power consumption will be reduced to
approximately 100mW.
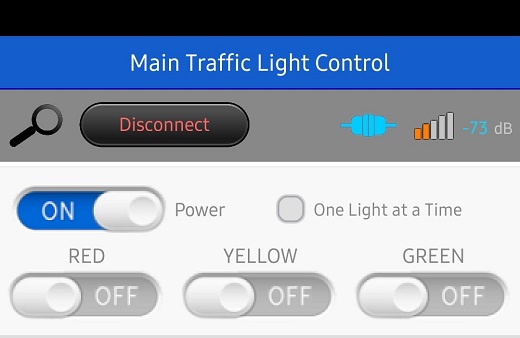
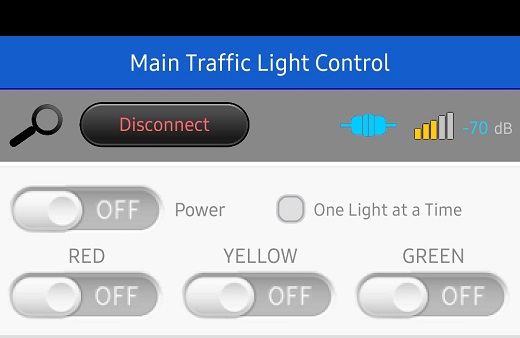
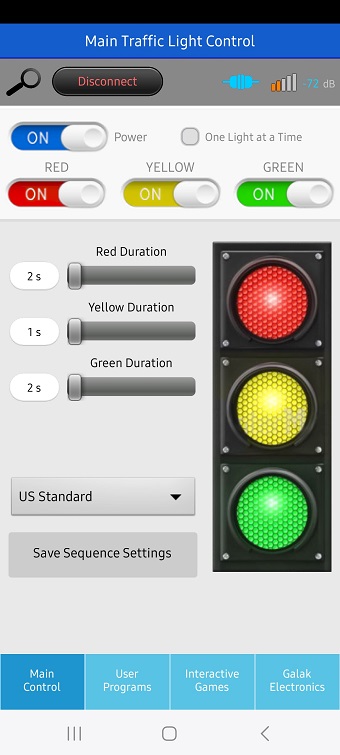
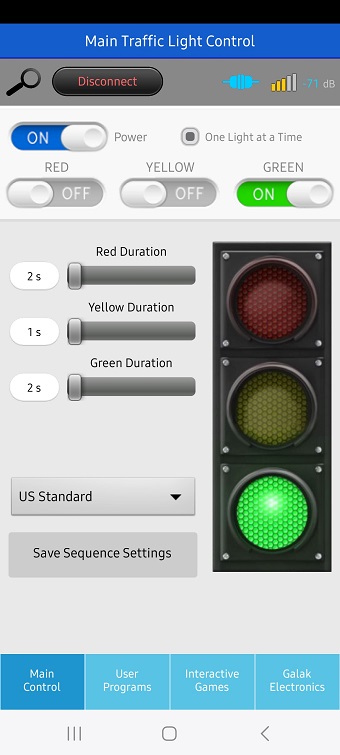
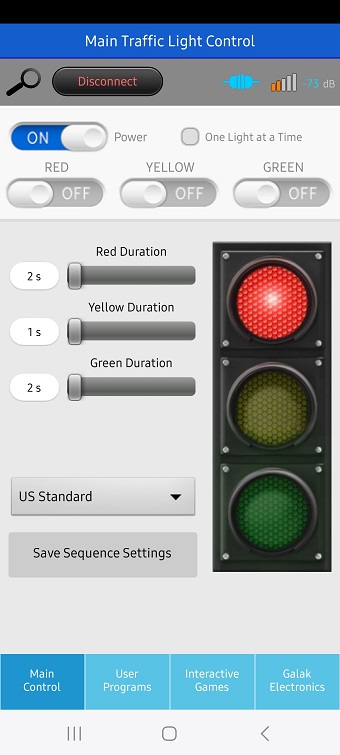
At any time, the regular sequence can be interrupted by toggling the three switches labeled RED, YELLOW, and GREEN. When the "One Light at a Time" check box is off, any
combination of lights can be selected. To automatically switch to just a single light at a time, toggle the "One Light at a Time" check box on as shown below center.
 > >
Please note: when all manual switches are off, the controller will return to normal operation, sequencing through the current program.
Selecting the Program Sequence
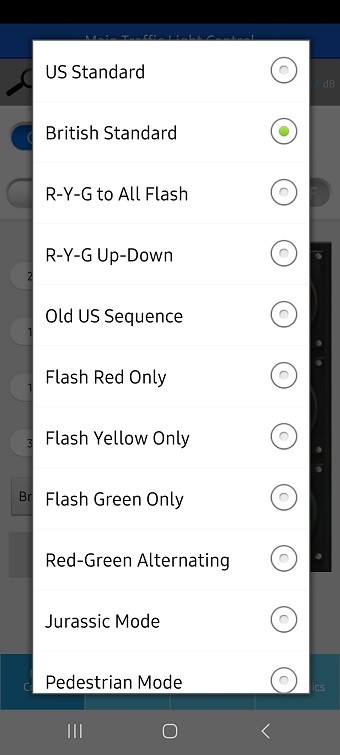
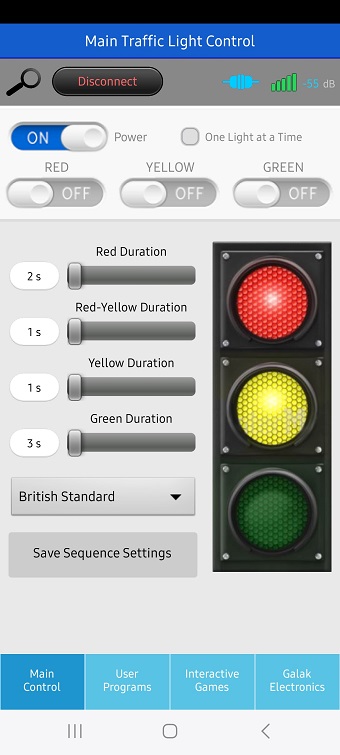
The VG-315A Traffic Light Controller has 39 built-in programs, including realistic traffic light sequences and popular chasing sequences. These sequences
operate independently from the Traffic Light Control+ app, so there is no need to have the app connected for the traffic light controller to work. To change the
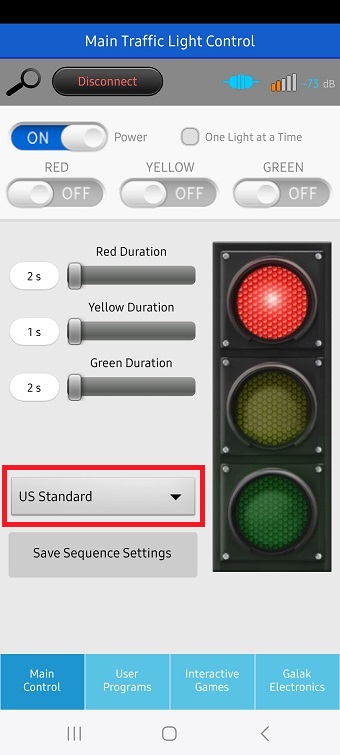
the program simply click on the pulldown menu (indicated below on the left) and select one of the 39 programs from the list. Depending on the program
selected, the number of duration settings and labels will change automatically.
Changing the Light Duration Times
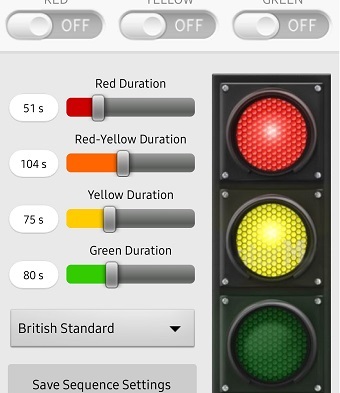
The durations for each program are unique to that program. So changing the durations of one program will not change the durations
of the others. To change the durations of the selected program, both the number boxes and the slides can be used. The slides can be
used to quickly adjust the durations by sliding them left and right as shown below on the left. To set the duration values more
precisely click on the number box corresponding to the duration to be adjusted. A keypad will open (shown below center).
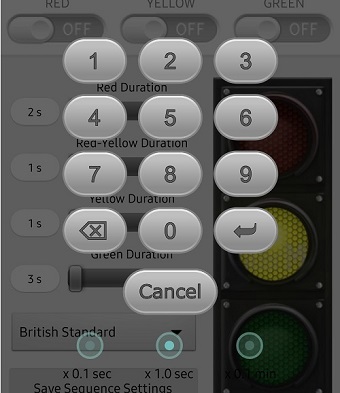
Use the keypad to enter a new value and the "backspace" button to make corrections. To exit out of the keypad without making
changes, press the "Cancel" button. To accept the changes press the "Enter" button. Each duration value can be changed in this mode.
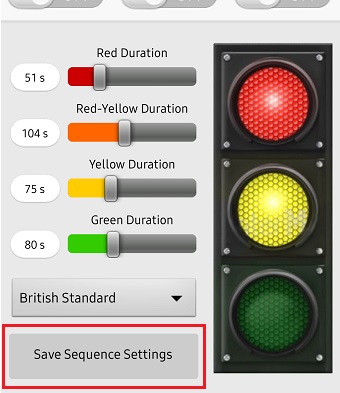
When all changes have been made, make sure to press the "Save Sequence Settings" in order to save the new values of the selected
program. Otherwise, the values will revert back to their default values when the program is changed or the power is cycled.
|

